
Your camera and lenses can easily get covered in dirt, sand and grime, especially if you shoot a lot out doors. The rubber surfaces of the camera can accumulate a lot of dust and sweat if you don’t clean it regularly. Hence giving it a regular clean becomes very important. As a photojournalist, I recommend you especially clean your equipment if you’ve been shooting in a dirty environment such as a hospital or the beach etc. The rubber surfaces of the camera can become apt breeding ground for germs if not cleaned away.
Maintaining and preserving your camera and equipment is almost as important as choosing the right camera for yourself.
A clean, well-maintained machine, is one you can trust and is less likely to suffer from malfunctions. Regular clean and maintenance helps prevent and protect it from damage. It also helps protect your workflow and reputation too. There can be nothing worse than a camera that breaks down while on assignment.
When cleaning your kit, it’s important to remove dirt first with a brush before wiping down with cloth or tissues. This helps prevent dirt getting trapped in the cloth/tissue, which can scratch the surface that you’re trying to clean.
Follow these simple steps to efficiently clean your kit.
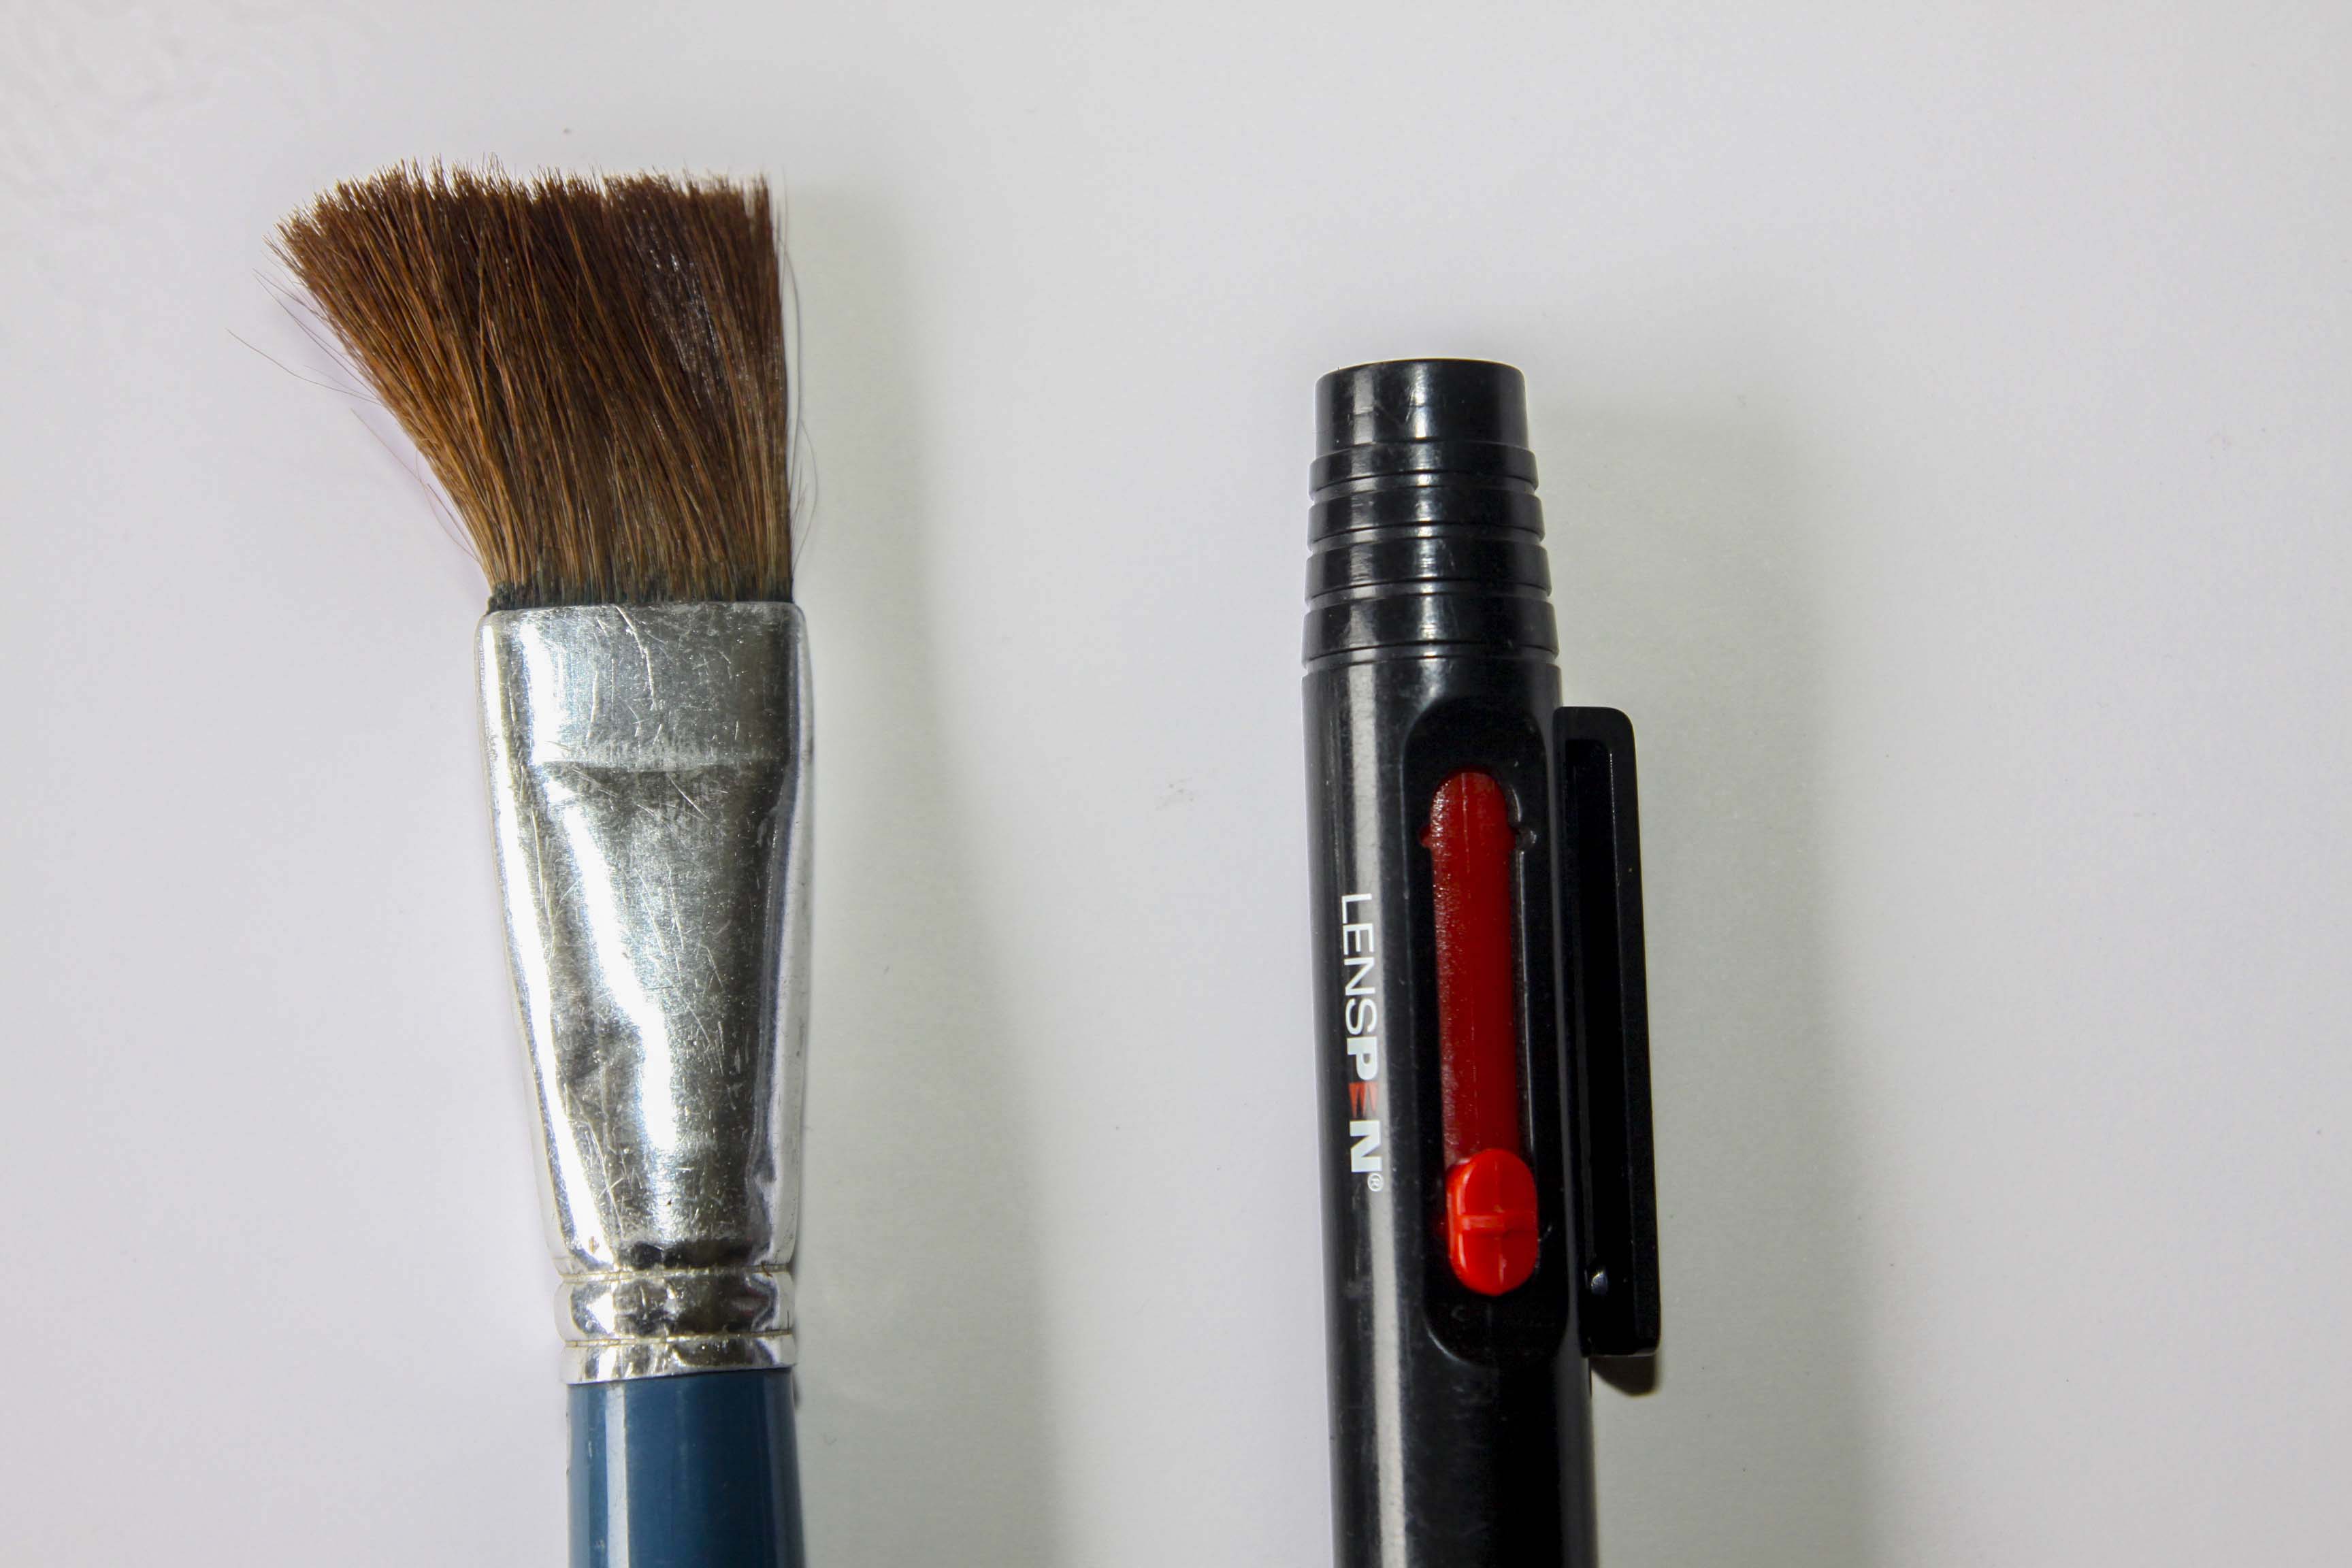
First start out by buying a set of brushes. You basically need 2-
1. A “Hard” brush. This is a normal painting brush found in most hardware/painting stores. The bristles on this are a bit harder and are more efficient in dislodging pieces of dirt from corners. Alternatively you could use a NEW tooth brush to use this. Do not use an old one, as the bristles would be spoilt and could potentially scratch your camera. This brush is for your camera and lens body only. Do not use this brush on your lens surface.
2. A “Soft” brush. I Recommend the LENSPEN. This is a simple, inexpensive but very effective device. Easily available online or in camera stores. You cant go wrong with this. It has two surfaces, one a soft brush to use on cleaning the front glass elements of your filter and lens, and another soft tip for removing any bigger particles. Buy a couple and always keep one in your camera bag. The other can rest in your desk drawer for convenience.
Just using these two things regularly (once a month or so) to clean your system, really helps protect your equipment. You don’t really need to do anything else. There are however other, slightly more elaborated methods to follow, which I will discuss further in this post.
Begin by –
Step 1.
Begin by removing all accessories such as your strap etc. and then start to gently brush the surface using the painting brush. Pay attention to the more inaccessible areas such as the rubber dust caps, where dirt is likely to accumulate.
Always brush these areas gently and always “outwards” and away from the body. This helps prevent buildup of static electricity (that attracts dust) and also prevents dust from getting inside the ports, which is difficult to clean. Never brush your memory card slots. These are very sensitive; any sort of rubbing will build up static charge which will short circuit and spoil your cards.
Step 2.
Pay extra attention to all the nooks and crannies such as the corners of the strap mount, the view finder etc. Remove the rubber cap and gently brush between the surfaces. Use a soft tissue or lint free cloth (soft cotton cloth) to clean the glass surface. Dirt in these areas can be a bit difficult to clean sometimes, so I recommend using ear-buds and just A DROP or rubbing alcohol (easily availablein a chemist’s store.) Never use acetone (nail polish remover) this will eat up the plastic and rubber surfaces of your camera body. 
Additionally I also recommend cleaning the rubber eye cup, especially in the summer months as it is very prone to buildup of dust and sweat and can lead to eye infections.

Step 3
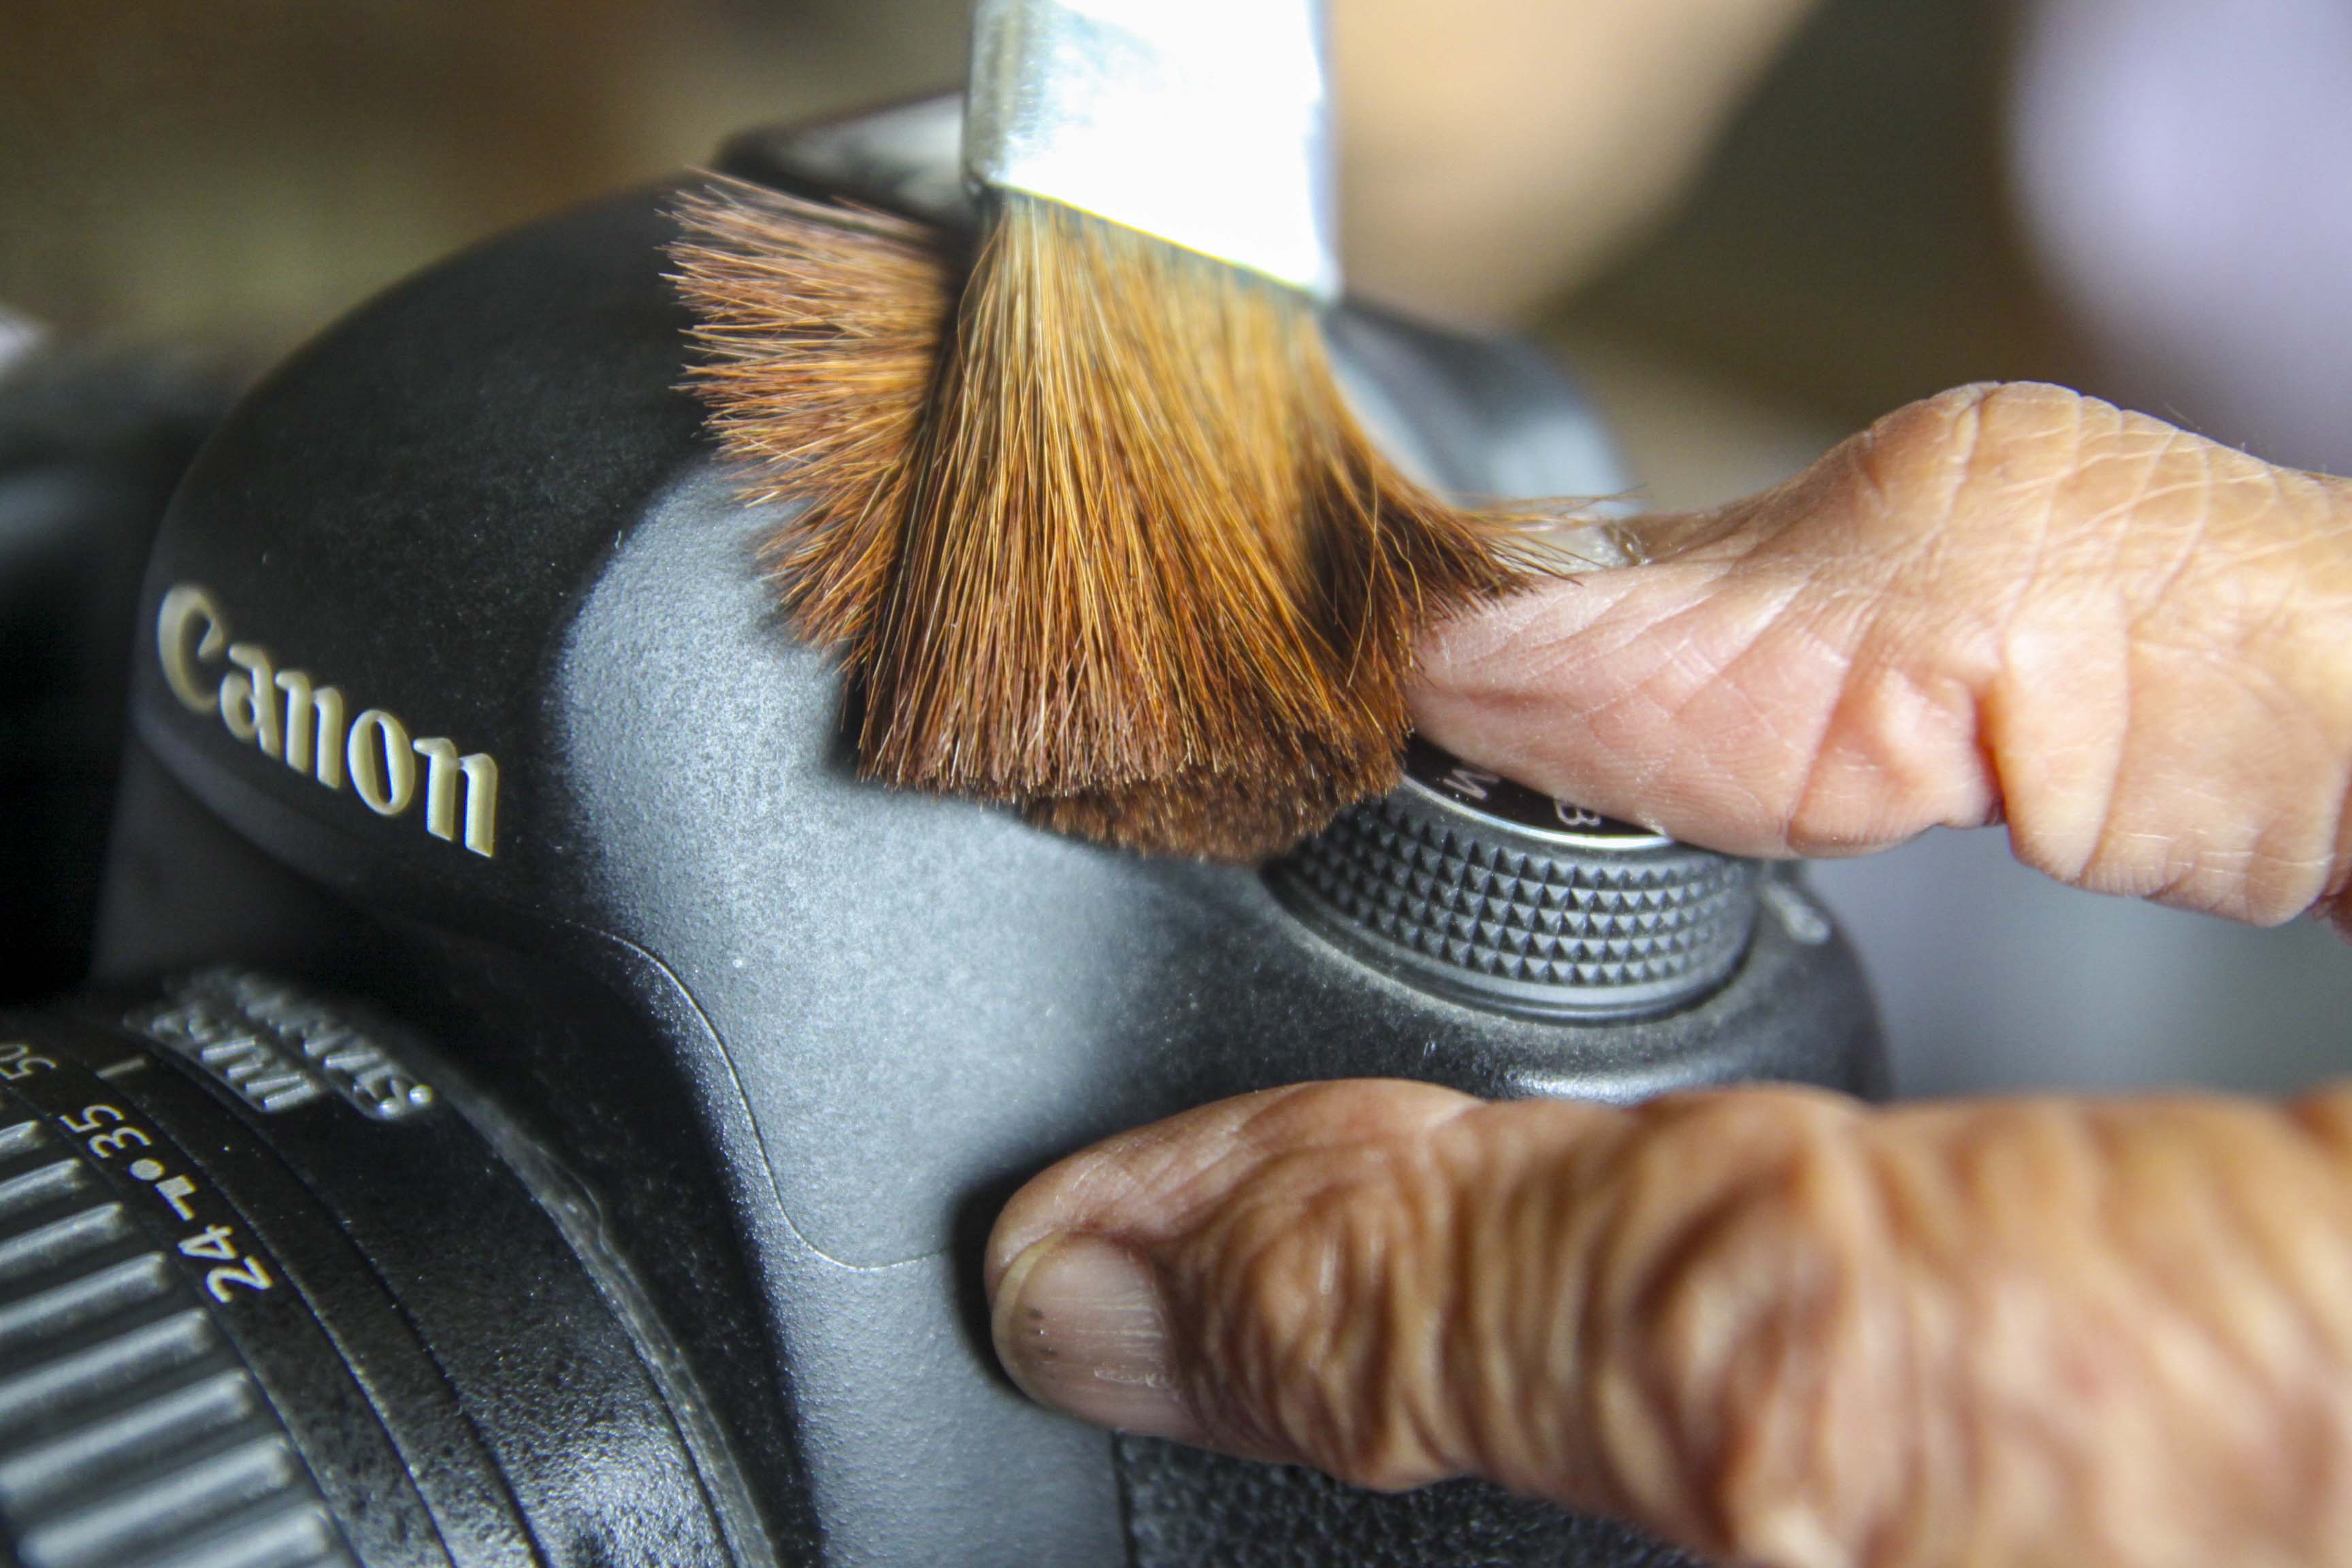
The lens. Continue, gently using the hard brush on the body of your lens. Always remember to brush outwards. For the main lens surface, bring out the lens pen, using the soft brush side, gently brush away any loose dust on the glass elements.
 Secondly, now use the other soft tip for a thorough clean. Start out in the center and in a round spiral motion; work your way toward to the corners.
Do this twice to effectively clean you front element.
Voila! You have a clean kit!
Additionally here are a few things.
If you are as crazy as I am about cleanliness, buy a set of ‘Kimwipes’. These are tissues meant for laboratory use. These are not that expensive, and last a long time. (I bought mine online at amazon.in).
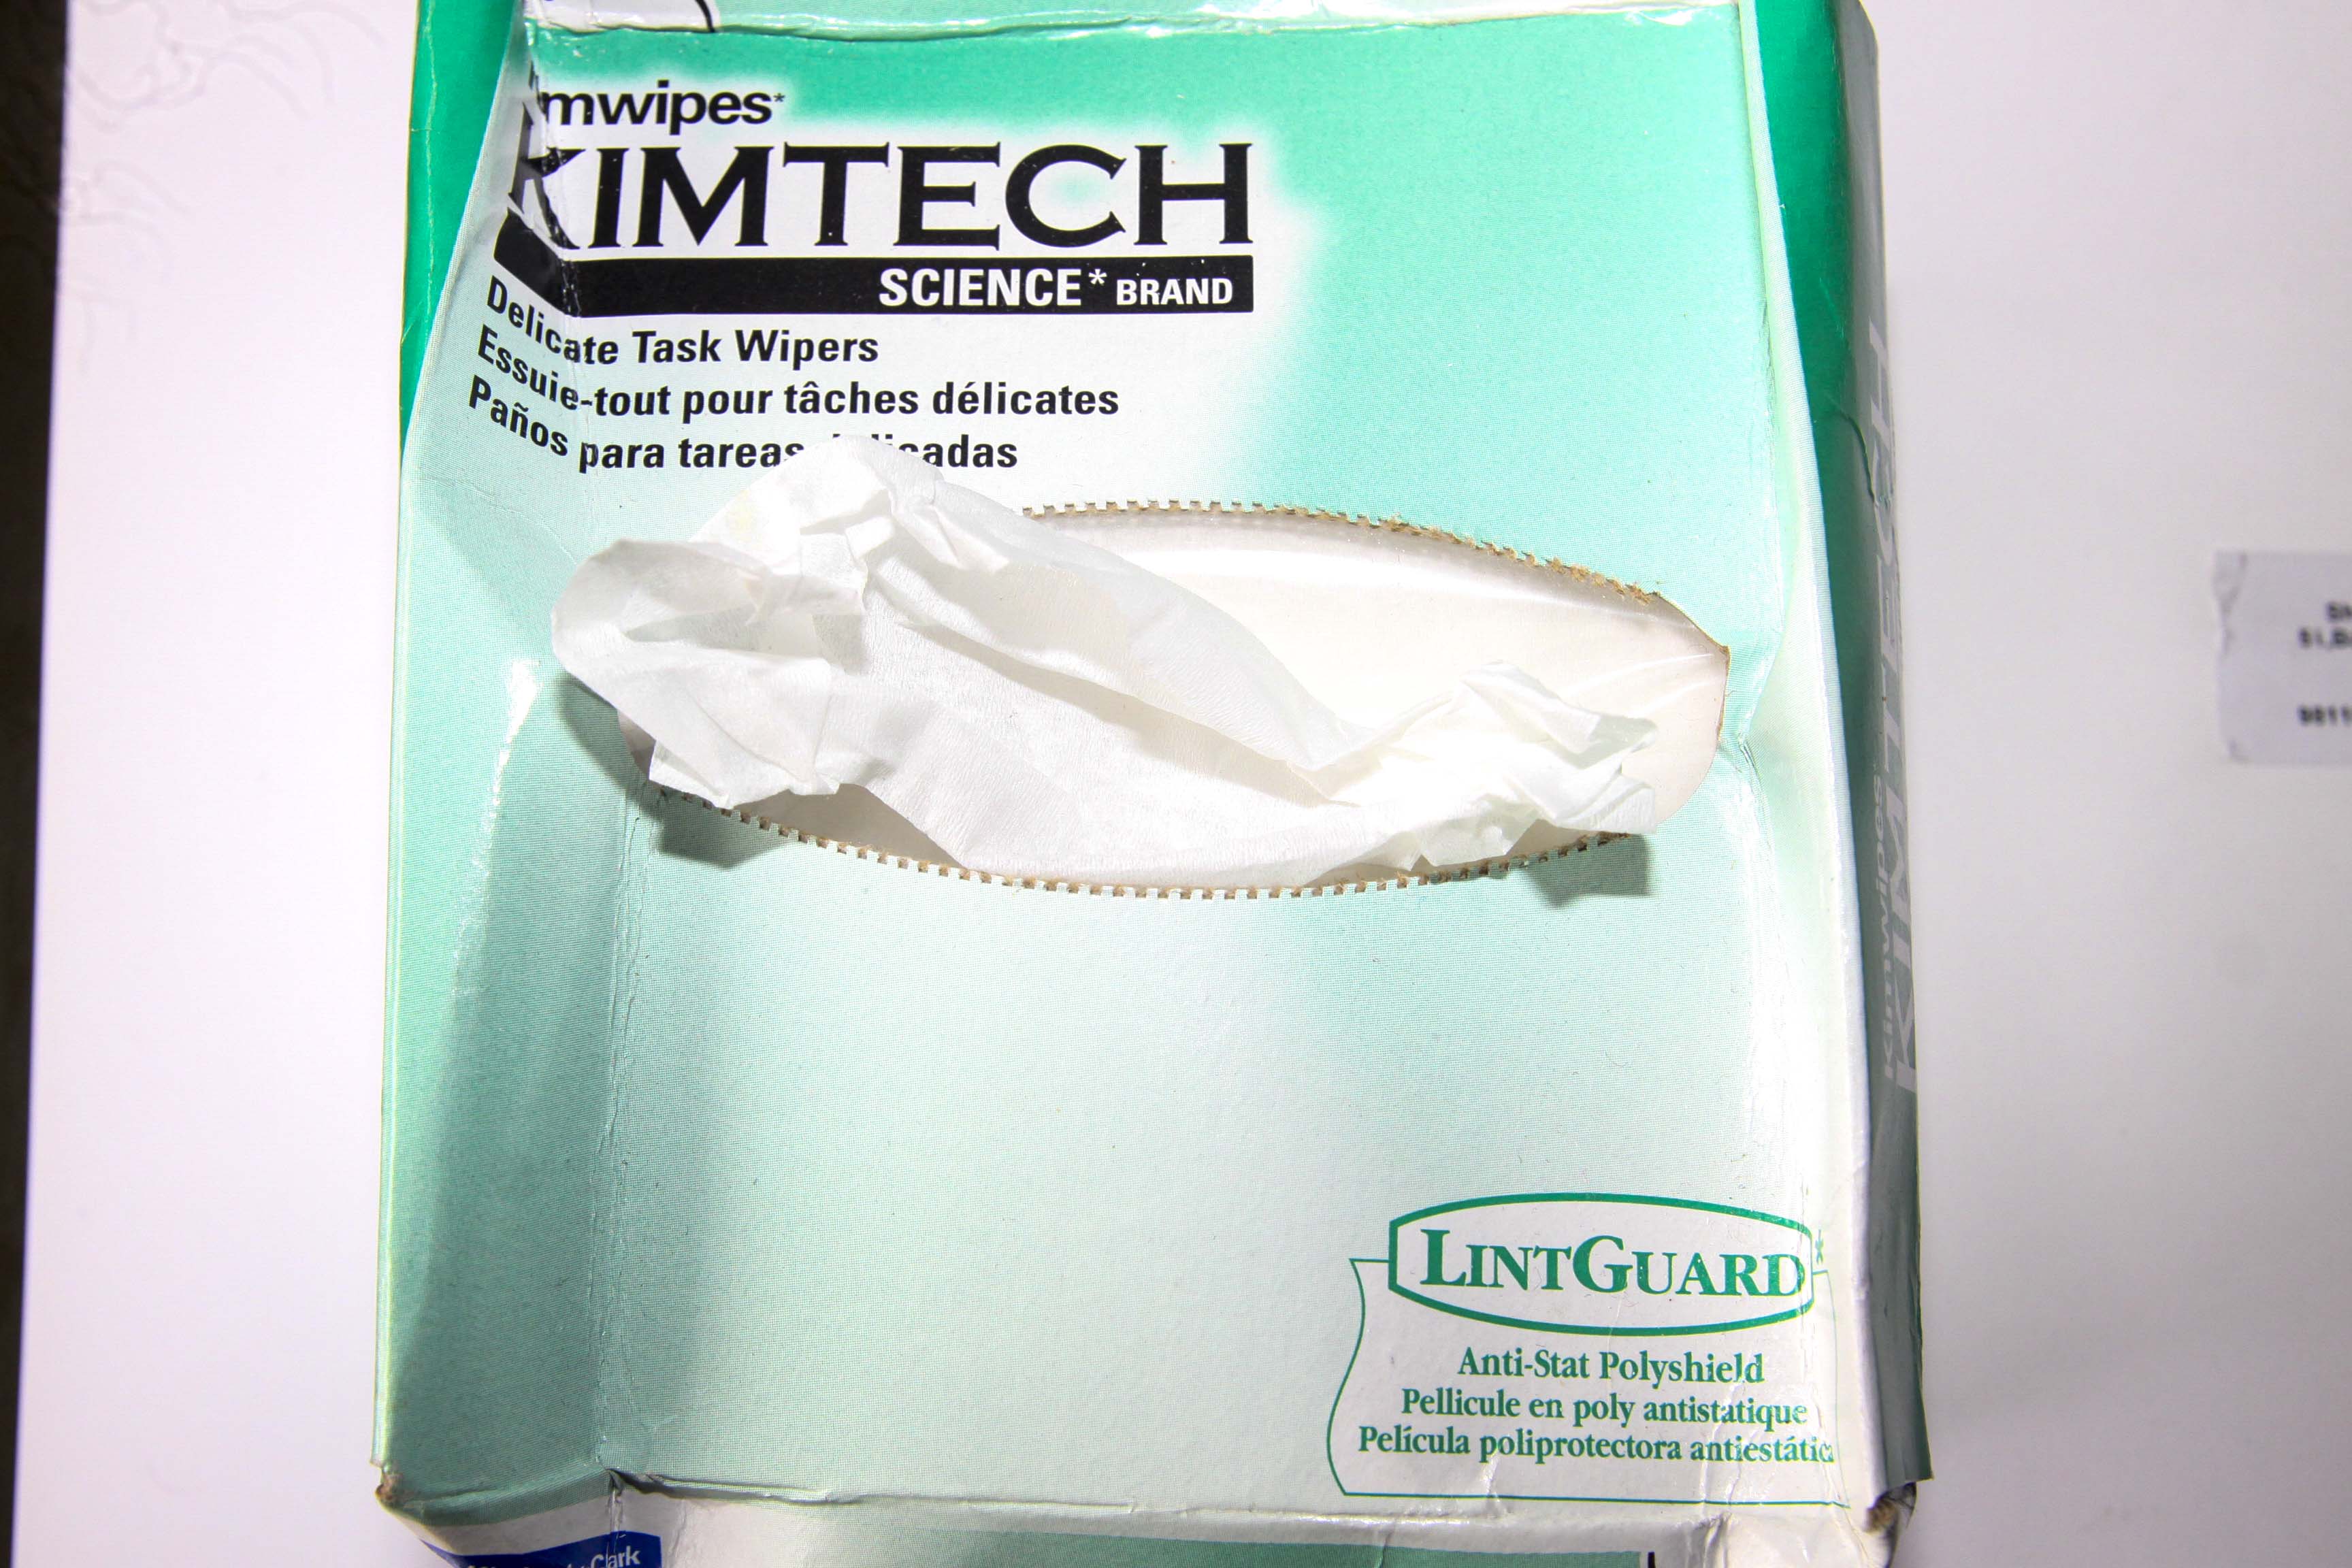
The reason I use them is because they are anti static, and help keep dust off the camera and lens surface. Just take a couple of tissue and rub down your camera and lens, especially surfaces that are more prone to dust and sweat, such as the finder, the LCD and the lens.
A quick note on weather and dust resistance of cameras- Most cameras and lenses are billed as weather and dust resistant, and they are! However this does not mean hat they don’t get dirty. Some lenses such as my Canon 24-105 shown here have an additional rubber seal at the back to stop dust etc. from getting inside.

This is a very effective feature, however, what you need to know is that this sealing is not complete, in the sense that canon recommends using a simple protection filter in the front to complete this sealing. I recommend using a B+W clear filter or a Marumi DHG (digital High Grade) for protection. I bought mine from Balaji Impex in New Delhi, they are the distributors in India for these filters.
(Contact- Mr. Deepak Gupta email- impexb@gmail.com phones- +919811 081481, +91 11 2386 7818)
Now, if you use multiple lenses and change them out often, eventually you will end up with dust in you mirror box. Cleaning this is simple too. Take off your lens and just gently give a few brushes with your lens pen. Just clean the finder and mirror surfaces, do not clean under the mirror as the shutter would then be exposed and you risk causing damage to it.
Some people prefer to perform a “wet” clean on their cameras, I do not recommend this for regular cleaning, but probably every 3months or so is alright. I prefer using a lint free cloth and only a few drops of rubbing alcohol poured onto the cloth. Refrain from pouring any cleaning liquid directly onto the camera. The “ozonized water” camera cleaning spray from Matin is also a good choice (also available at Balaji Impex) It helps clean your camera surface and keep it static free.
Now taking this a step further, as the climate of Delhi has changed from hot and dry to hot and humid, I’ve seen a change in the way my equipment behaves over the seasons. Moisture and fungus is HUGE trouble, and even in winter months, condensation tends to collect. I suggest investing in a “DRY CABINET” by Benro. (I bought mine online from www.photovatika.com)

These are now easily available. They are a bit expensive however, but in the long run, they are a very small investment when you take into account the cost of your gear. They help keep the dust out of your lenses and control the humidity, thus preventing any fungus buildup.
All in all, I would say, the step by step cleaning process is enough to help in maintaining your equipment, the rest of the suggestions are just add -ns for future proofing and preserving your equipment.
Caring for your equipment not only helps keep the bugs at bay but also helps in preserving the resale value of your equipment, as and when you look to sell it and upgrade/shift to a different system.
_______________
Update- Please read my ethics statement on the ‘About’ page regarding these links and suggestions.
_________
[If you found this blog post useful, it would be great if you could engage, share and subscribe to make it popular and take a step further in creating a free, objective and real world online resource for photography.]
